How to update BIOS/UEFI firmware if the manufacturer supports only Windows and there are no updates on LVFS/fwupd

Hello everyone,

I updated from Gnome 45 → 46 today (smooth upgrade, thanks to everyone who made it happen :hugs:) and happened to look at my firmware version when taking a screenshot.

Unfortunately it’s several versions out of date and the manufacturer (Lenovo) supports only .exe programs to update it from Windows. They also haven’t pushed the updates to LVFS/fwupd. I have contacted Lenovo support but don’t really expect a positive outcome as far as them pushing the updates to LVFS.

General opinion on the interwebs seem to be:

  1. Install Windows onto a secondary drive/partition and perform the BIOS update that way
  2. Install something called Windows PE which is supposed to be some free but closed source live environment to perform the update

Is there any way to unpack the exe archive and perform the update from openSUSE, has anyone got better ideas? :thinking:

Thanks :smile:

Maintained and reassembled several ThinkPads:

root@linux-server1: ~
# inxi -zSMCm
System:
  Kernel: 6.8.2-1-default arch: x86_64 bits: 64
  Console: pty pts/1 Distro: openSUSE Tumbleweed 20240407
Machine:
  Type: Laptop System: LENOVO product: 2447K70 v: ThinkPad W530 serial: <filter>
  Mobo: LENOVO model: 2447K70 serial: <filter> UEFI: LENOVO v: G5ET96WW (2.56 ) date: 11/27/2013
Memory:
  System RAM: total: 32 GiB available: 31.17 GiB used: 3.35 GiB (10.8%) igpu: 64 MiB
  Array-1: capacity: 32 GiB slots: 4 modules: 4 EC: None
  Device-1: ChannelA-DIMM0 type: DDR3 size: 8 GiB speed: 1600 MT/s
  Device-2: ChannelA-DIMM1 type: DDR3 size: 8 GiB speed: 1600 MT/s
  Device-3: ChannelB-DIMM0 type: DDR3 size: 8 GiB speed: 1600 MT/s
  Device-4: ChannelB-DIMM1 type: DDR3 size: 8 GiB speed: 1600 MT/s
CPU:
  Info: quad core model: Intel Core i7-3740QM bits: 64 type: MT MCP cache: L2: 1024 KiB
  Speed (MHz): avg: 1591 min/max: 1200/3700 cores: 1: 1500 2: 1200 3: 1200 4: 1200 5: 1200
    6: 1200 7: 1532 8: 3700

root@linux-server1: ~
# 

When upgrading the UEFI I referred to their “User Guide ThinkPad T530, T530i, and W530” , Section “Updating your system UEFI BIOS”. Their procedure worked as described.

They have iso: BIOS Update (Utility & Bootable CD) for Windows 10 (64-bit), 8.1, 8, 7 (32-bit, 64-bit), XP - ThinkPad T530, T530i - Lenovo Support US

1 Like

Good to know, Lenovo goes the extra mile by creating these bootable ISOs for their premium Thinkpad line but not for my entry level Ideapad. :smiling_face_with_tear:

The ThinkPads are refurbished hardware. Current model is:

thinkbook:~ # inxi -zM
Machine:
  Type: Laptop System: LENOVO product: 21DL v: ThinkBook 15 G4 ABA serial: <filter>
  Mobo: LENOVO model: LNVNB161216 v: SDK0T76530 WIN serial: <filter> UEFI: LENOVO
    v: JPCN19WW(V1.05) date: 07/18/2022
thinkbook:~ # 

Upon entering the serial I was offered laptops and netbooks :: thinkbook series :: thinkbook 15 g4 aba :: 21dl :: 21dl000bge :: mp2cy7ys - Lenovo Support US

I have an USB-stick with DOS (Rufus) and some old HDD with Win7 for (BIOS) updates like this. Always good to have… (but only Dell hardware here)

1 Like

Oh, so it appears they have discontinued providing it for newer Thinkbooks too!

Thanks for chiming in, I’m planning to try out that Windows PE thing from USB.
Will post any updates as they’re available!

As with many systems, it’s actually easier than you think (compared to the other solution provided).

You copy the .exe to the EFI partition and the update will happen.
.
.
Might also read this thread, as Discover can update (using lvfs and fwupd). my Dell - only 7 posts to read

1 Like

I can’t believe it’s that easy :exploding_head:. Going to try it now! :crossed_fingers:

Here’s my other response doing this (another thread)

1 Like

No EFI here… :smiley:

Thanks, did not work out for me on Lenovo though! :smiling_face_with_tear:

On my home-built desktop (Asus mobo, AMD proc, AMD graphics), I simply copy the BIOS update file to a USB stick, then boot into the (Asus) BIOS settings, BIOS → Update section, then select the USB stick.

The BIOS itself does the update - even offers to backup current BIOS, in case the new update fails.

I’m surprised Lenovo doesn’t offer a simple solution, using the BIOS.

1 Like

I anticipated these issues and bought the ThinkBook with Windows 11 Pro. When installing Tumbleweed I squeezed ntfs and added btrfs:

thinkbook:~ # fdisk -l /dev/nvme0n1
Disk /dev/nvme0n1: 476.94 GiB, 512110190592 bytes, 1000215216 sectors
Disk model: SAMSUNG MZAL4512HBLU-00BL2              
Units: sectors of 1 * 512 = 512 bytes
Sector size (logical/physical): 512 bytes / 512 bytes
I/O size (minimum/optimal): 512 bytes / 512 bytes
Disklabel type: gpt
Disk identifier: 7DBBDC49-D9D4-495E-B5FD-53CAC1F4ED46

Device             Start        End   Sectors   Size Type
/dev/nvme0n1p1      2048     534527    532480   260M EFI System
/dev/nvme0n1p2    534528     567295     32768    16M Microsoft reserved
/dev/nvme0n1p3    567296  205367295 204800000  97.7G Microsoft basic data
/dev/nvme0n1p4 996118528 1000214527   4096000     2G Windows recovery environment
/dev/nvme0n1p5 205367296  996118527 790751232 377.1G Linux filesystem

Partition table entries are not in disk order.
thinkbook:~ # 

More user data sit on an external drive:

thinkbook:~ # inxi -D
Drives:
  Local Storage: total: 4.1 TiB used: 2.64 TiB (64.3%)
  ID-1: /dev/nvme0n1 vendor: Samsung model: MZAL4512HBLU-00BL2 size: 476.94 GiB
  ID-2: /dev/sda vendor: Crucial model: CT4000P3 SSD8 size: 3.64 TiB type: USB
thinkbook:~ # 
thinkbook:~ # btrfs filesystem usage -T /Crucial/
Overall:
    Device size:                   3.64TiB
    Device allocated:              2.62TiB
    Device unallocated:            1.01TiB
    Device missing:                  0.00B
    Device slack:                    0.00B
    Used:                          2.62TiB
    Free (estimated):              1.02TiB      (min: 525.38GiB)
    Free (statfs, df):             1.02TiB
    Data ratio:                       1.00
    Metadata ratio:                   2.00
    Global reserve:              512.00MiB      (used: 0.00B)
    Multiple profiles:                  no

             Data    Metadata System                             
Id Path      single  DUP      DUP       Unallocated Total   Slack
-- --------- ------- -------- --------- ----------- ------- -----
 1 /dev/sda1 2.58TiB 44.00GiB  80.00MiB     1.01TiB 3.64TiB     -
-- --------- ------- -------- --------- ----------- ------- -----
   Total     2.58TiB 22.00GiB  40.00MiB     1.01TiB 3.64TiB 0.00B
   Used      2.57TiB 21.21GiB 336.00KiB                          
thinkbook:~ # 

Booting into Windows 11 is PITA. However every other year some appliance wants to talk to Windows only. A few years ago I shredded the flash storage of my Garmin FR735XT.

I went to a friend of mine and tried to recover from the mishap. However the Garmin site had been attacked by ransom ware and was down for a week.

In the meantime I installed free Windows 10 from ISO on the 6700k, a sibling of erlangen. When the Garmin site was great again I attached the watch and got recovery within a few seconds.

1 Like

From what I’ve seen of PC building in Youtube, the UEFI BIOS of discrete mobos are quite nice looking and offers a lot of customization :100:

But mine, though UEFI looks like the 90s blue screen BIOS and has very limited customization, happy Lenovo is at least pushing out updates for it :face_holding_back_tears:

Thanks everyone for your inputs, learned one could update the BIOS in quite a few different ways than I knew was possible! :handshake:

What I ended up doing and worked for me was:

  1. Downloaded Hiren’s BootCD PE ISO and copied it and the firmware updater exe file to the Ventoy vfat partition on an external SSD drive.
  2. Disabled Secure Boot and booted up into the Hiren ISO which is based on Windows 11 PE but with additional drivers and tools. Also, I found it wasn’t possible to create a Windows PE ISO without a working Windows installation.
  3. Copied the firmware updater exe file to “Documents” and installed it.
  4. Loud fan noises, several restarts, and some flashing progress/verification screens later I was able to see the updated BIOS.
  5. Updated BIOS settings as those were reset to default after the upgrade and enabled Secure Boot

First time I did this on my secondary machine (same model as primary but with lower specs) I wasn’t quick enough to cancel the countdown that wiped the boot menu entries. Had to boot without Secure Boot, update bootloader settings from Yast and reboot back with Secure Boot enabled.

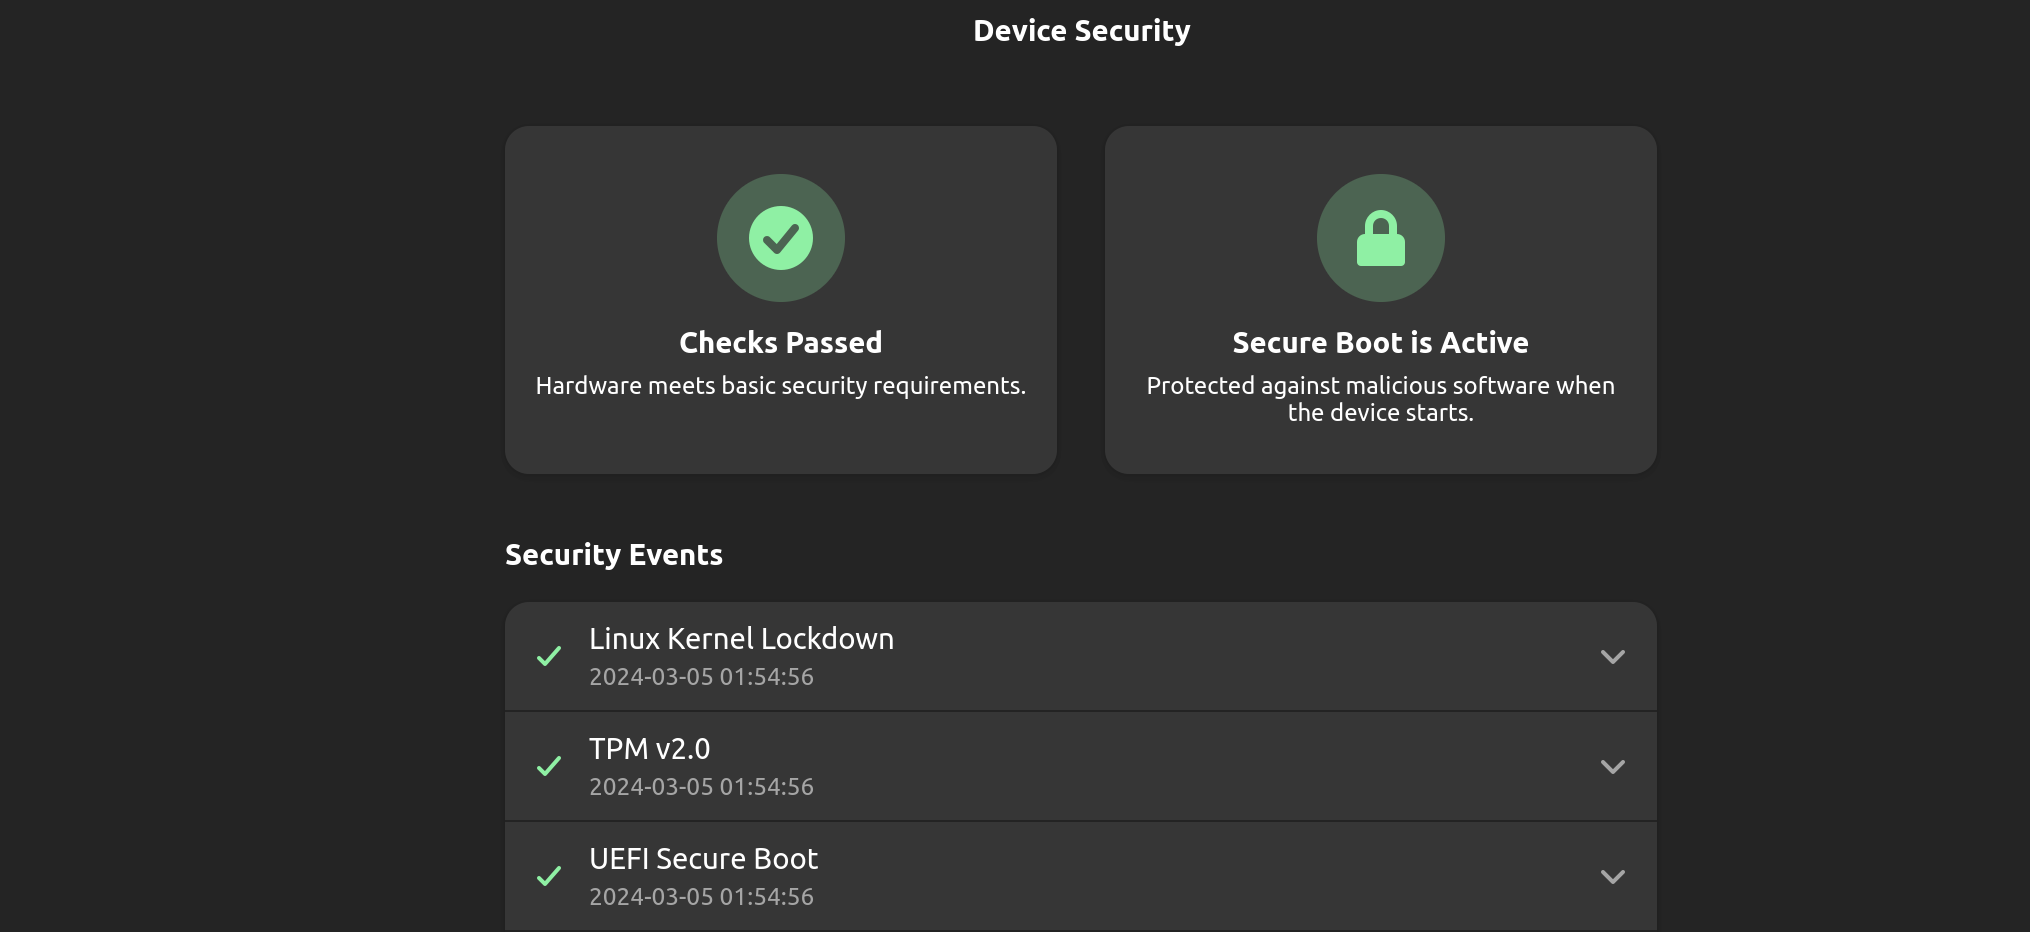
Anyway, for all these efforts I was rewarded with an HSI 1 pass result from Gnome device security for the very first time since I purchased this device a few years ago. :white_check_mark:

This topic was automatically closed 7 days after the last reply. New replies are no longer allowed.