So here are(in my opinion) the things you should do after openSUSE install.
Install sof-firmware.
If you have no sound on your system, fret not. open a terminal, type in:
sudo zypper in sof-firmware.
Then reboot.
For intel bay trail or cherry trail systems after reboot, open a terminal and type in: sudo nano /etc/modprobe.d/sof.conf
Add: options snd_sof sof_debug=1
Save the changes with Ctrl+ X and confirm with yes .
Press Enter and then reboot the system.
Install multimedia codecs
Out of the box, openSUSE does not come with support for most codecs. This can be a problem(I know Cisco has helped, but still)
Open YAST Software repositories, click add, then select community repositories.
Select the Packman repo. I will cover Nvidia driver installation later.
Wait as it downloads the repository info, then click ok.
Then in a terminal, type in: sudo zypper dup --from packman --allow-vendor-change -y. Make sure all applications like Firefox and VLC that utilize media codecs are closed.
If you see package conflicts, select the vendor change to packman.
Install Nvidia drivers.
Nvidia officialy supports openSUSE Tumbleweed and Leap. To install the drivers, open YAST Software Repositories, click add, then click Community Repositories. Select the Nvidia Graphics Drivers repo, and wait for it to download the repo information.
After it is done, click ok to close it.
Open YAST online update, install all the packages that YAST selects, and reboot.
Just my 3 cents. If you have any problem, please contact me.
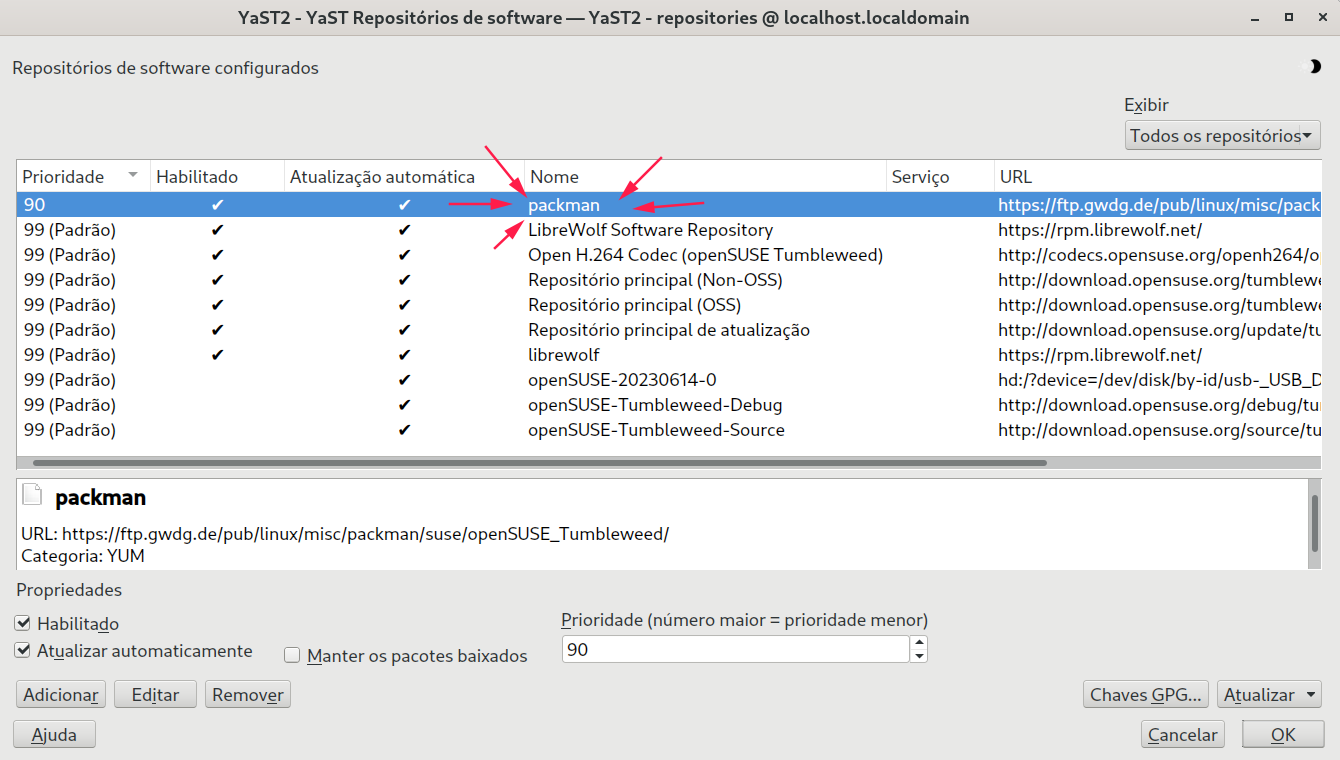
After adding the Packman Repository in YAST, it will need to be renamed to packman for the command to work. Just highlight the Packman Repository and click the Edit button to make the change. (case sensitive)
Maybe, you could point out that, the “sof-firmware” package contains the “Sound Open Firmware” firmware data files for SOF support – in place of the vendor-supplied firmware which is normally used.
Multimedia – read “MP4/H.264 Video Support” for Firefox and possibly other web-browsers also –
Hmmm. When I let YAST add it in, it is named Packman Repository and the “sudo zypper dup --from packman --allow-vendor-change -y” fails until I rename it. It always has.
Either that or edit the command to “sudo zypper dup --from “Packman Repository” --allow-vendor-change -y” and then it will work.
I understand now. Previously you called it pacman which is still incorrect.
You don’t need to rename the repository. You can if you want, but you can also adapt the command line. For me it’s called, both name and alias, packman-essentials.
So maybe in OP instructions the added repository doesn’t match the command line, I can’t tell as I haven’t tried. These instructions are available in the welcome screen after the installation, Readme button, there’s a link that leads to Additional package repositories - openSUSE Wiki
@Basilcat consider contributing these tips to the wiki, I don’t think it includes the 1st one in particular.
I always had to add repos via the command line in Arch, but as I was reloading this PC to move to BTRFS, this morning, I just added the Community Repo in YAST, since it is just a check box and I already had YAST open. But when I ran the command to zypper dup with the repo listed, it failed. Renaming the repo to match the command worked. I remember having to do the same things years ago, so I was not confused when it happened.
Please note the Zypper man page notes related to “dist-upgrade (dup) [options]” –
           --from alias|name|#|URI
               The option can be used multiple times and restricts the upgrade to the specified repositories only.
               Nevertheless all enabled repositories are visible to the resolver and will be considered to satisfy
               dependency problems.
In other words, either include the “name” in single quotes on the command line or, use the “alias” which is usually a single word –