Planning to make an external nvme SSD my backup PC

I’ve proceeded a bit further in setting up the Samsung 990 EVO Plus SSD, but in the process i managed to ‘clobber’ my Lenovo X1 Carbon Generation-9s grub, and I need to figure out how to fix that.

Some detail as to what transpired …

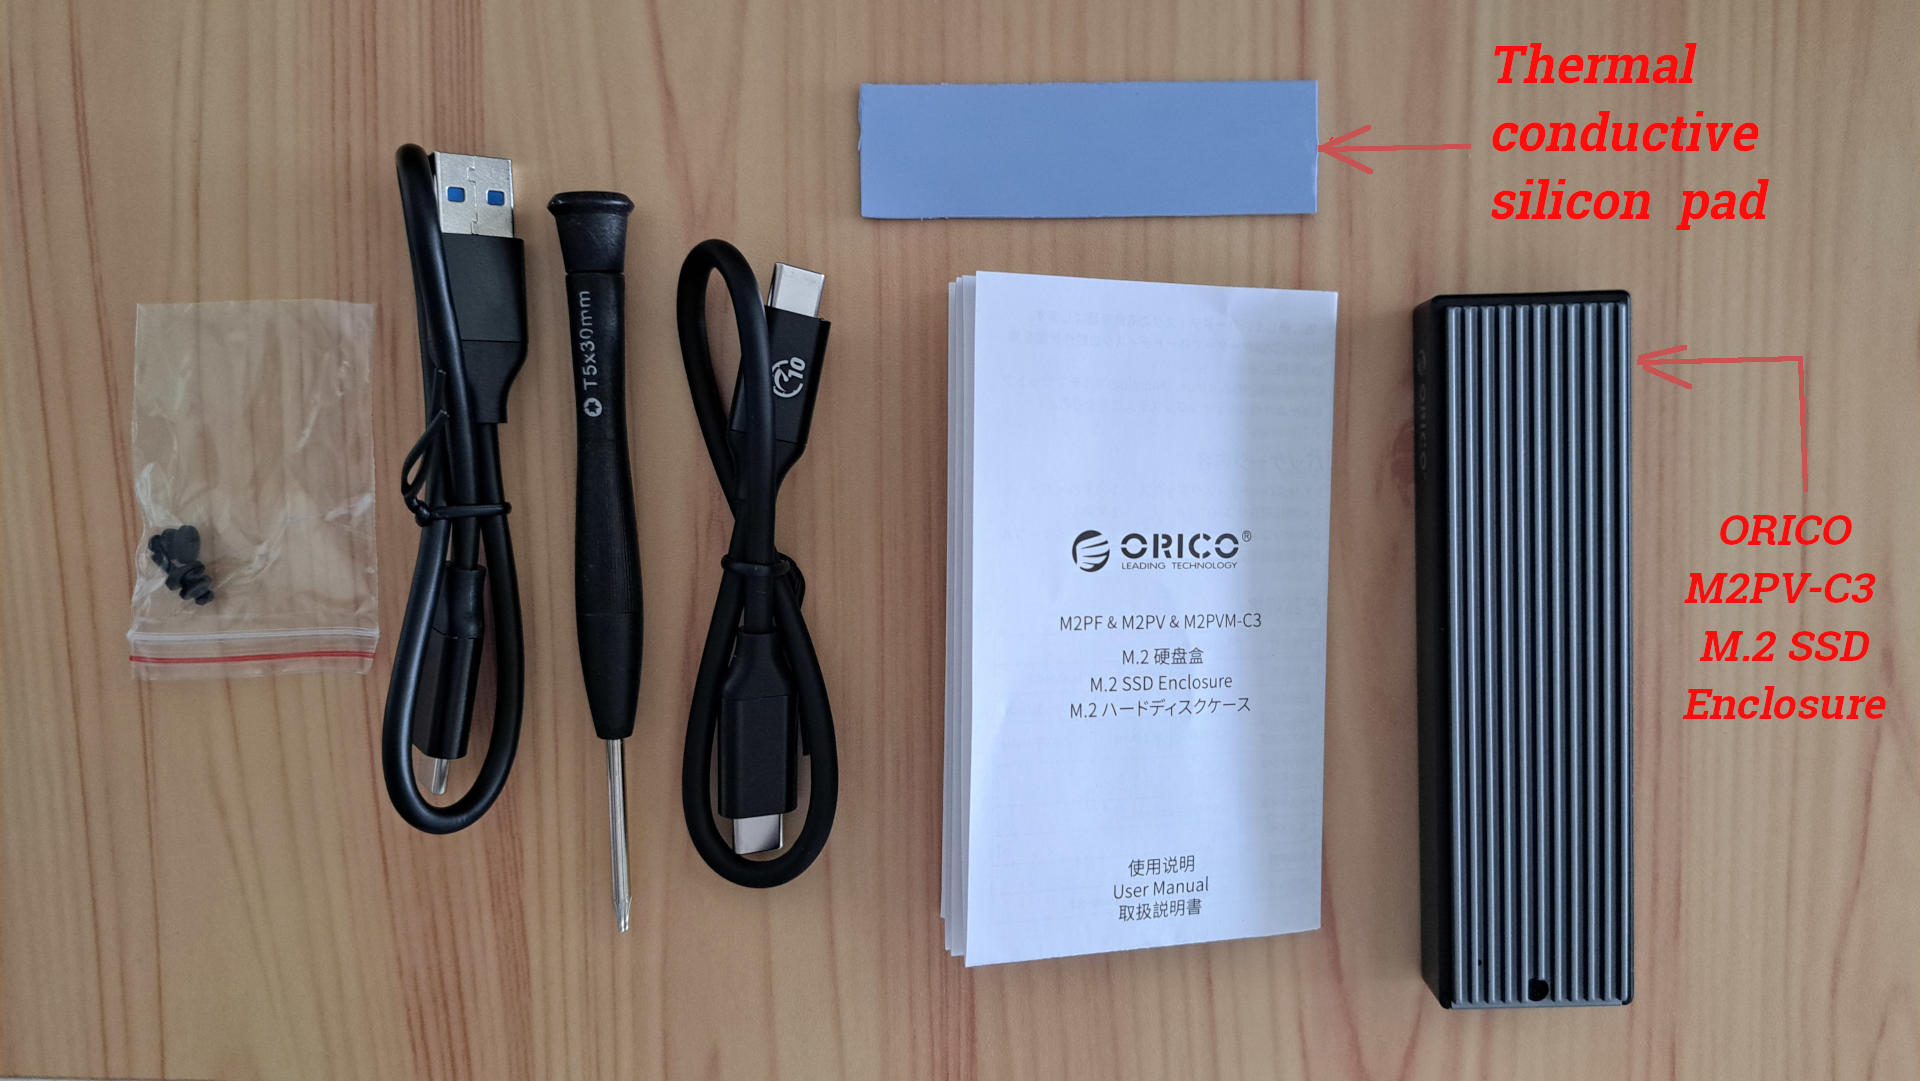
The ORICO M.2SSD Enclosure arrived by delivery today and I put the Samsung 990 EVO Plus SSD inside the enclosure.

I booted my Lenovo X1 carbon-generation-4 (gen-4) laptop (with Windows-10) , plugged in the enclosure, and Windows-10 recognized the enclosure. However Samsung’s Magician software running under Windows-10 could not see the SSD in the enclosure.

I unplugged the enclosure from the gen-4 laptop, and plugged it into my Lenovo X1 Carbon generation-9 (gen-9) laptop which was powered. I preformed an lsusb and the enclosure could be seen as 0bda:9210 Realtek Semiconductor Corp M.2. NVME adaptor. The unformatted SSD was not viewable.

I switched off the gen-9 laptop, plugged in installation USB for LEAP-15.6 and plugged in ORICO enclosure with the 1 TB samsung installed, and booted the USB.

Installing LEAP-15.6 on SSD inside the enclosure

I started the LEAP-15.6 installation.

The LEAP installation on my laptop could see the Samsung SSD inside the enclosure except the labeling was difficult. Why? Because my gen-9’s internal SSD is a 1 TB Samsung 980 Pro, as opposed to the external SSD being a 1 TB Samsung 990 EVO plus. Both are Samsung SSDs. Both are 1-TB. Further the Samsung model names are not used - instead I saw /dev/sda, /dev/sdb, nvme0n1 …

To be more exact: Instead I observed in the partitioner there was a /dev/nvme0n1 of 0.93 TiB (ie 1 TB), under which were a bunch of partitions of nvme0n1px each (x from 1 to 7) where each corresponded to a one of the partition sizes that I remembered on my internal Samsung SSD (in my gen-9).

Also in the partitioner was a /dev/sdb of 14.91 Gib, under which was a sdb1 of 4.31 MiB and a sdb2 of 4.31 GB … I deduced that was the installation USB

Which suggested to me that the /dev/sda which was 0.91 TB (with no partitions underneath) had to be the new Samsung 990 EVO plus in the ORICO controller.

Sound confusing? Well, that is how i felt also - a bit confused and unclear.

Still I proceeded with the installl (as my data is backed up in case i over wrote my internal SSD) on to the /dev/sda.

After installing, the laptop rebooted and gave me a massive GRUB menu. An incredible number of entries to choose from. That was NOT expected.

I might reboot later and write down what i saw in the Grub menu. One option was LEAP-15.6 so i selected that and it took me to a clean LEAP-15.6 desktop (ie that seen immediately after an install). I believe that was LEAP-15.6 on the Samsung in the ORICO USB enclosure.

CLOBBERED GRUB on Lenovo Generation 9 (gen-9) laptop

I shut down my laptop, removed the openSUSE USB stick, unplugged the ORICO USB enclosure, and my gen-9 booted direct to MS-Windows !! No Grub menu. A straight boot to MS-Windows !!

That was NOT supposed to happen. Somehow, I clobbered Grub on my internal Samsung drive.

I shutdown the laptop, plugged in the LEAP-15.6 installation USB (possibly not needed) and plugged in the ORICO USB enclosure, switched ON, and obtained that massive Grub menu. I selected another item on the menu (that made sense - but as I type I can not recall what that selectiion was) and my gen-9’s old LEAP-15.6 booted, with all my data and apps still on this gen-9’s internal drive.

So the GOOD NEWS is i did not overwrite my LEAP-15.6 in the gen-9 (nor overwrite Windows - not that i care about that Windows , but I do care about my LEAP-15.6 on the gen-9). And the SSD in the Enclosure has LEAP-15.6 installed.

But GRUB is totally screwed up.

Before i do anything else I want to fix my gen-9’s GRUB. Without the enclosure (and maybe the installation USB) plugged in, I can not boot LEAP on my gen-9, which is very annoying.

What is the saying? two steps forward and one step back?

Next task: sort out how to fix my gen-9’s GRUB.

1 Like

So this illustrates the Good news - partitions are still intact on laptop and partitions now in place on external SSD. However somehow I have messed up GRUB. This needs some investigation by me. The laptop booting direct to MS-Windows suggests I possibly clobbered something in /boot/EFI. … I am embarrassed to admit, I forgot to back that up before this (which is unlike me, I am normally paranoid about backups and I always (except this time) backup the EFI directory.

1 Like

@oldcpu Windows is installed in UEFI mode, your external USB isn’t? Boot from a Rescue USB and check what files are in/dev/nvme0n1p1

1 Like

Thankyou for the suggestion. I adopted a bit of a different approach.

Since I was running the LEAP-15.6 that was previously (and still) on my Lenovo laptop (with only Grub screwed up) instead I (successfully I think) did the following:

oldcpu@lenovo:~> sudo su -
lenovo:~ # grub2-install --target=x86_64-efi --efi-directory=/boot/efi --bootloader-id=openSUSE_Internal --recheck
Installing for x86_64-efi platform.
Installation finished. No error reported.

and then I ran grub.cfg

lenovo:~ # grub2-mkconfig -o /boot/grub2/grub.cfg
Generating grub configuration file ...
Found theme: /boot/grub2/themes/openSUSE/theme.txt
Found linux image: /boot/vmlinuz-6.4.0-150600.23.53-default
Found initrd image: /boot/initrd-6.4.0-150600.23.53-default
Found linux image: /boot/vmlinuz-6.4.0-150600.23.47-default
Found initrd image: /boot/initrd-6.4.0-150600.23.47-default
Warning: os-prober will be executed to detect other bootable partitions.
Its output will be used to detect bootable binaries on them and create new boot entries.
5010.132769 | DM multipath kernel driver not loaded
Found Windows Boot Manager on /dev/nvme0n1p1@/EFI/Microsoft/Boot/bootmgfw.efi
Found openSUSE Leap 15.6 on /dev/sda3
Adding boot menu entry for UEFI Firmware Settings ...
done
lenovo:~ #

I then shut down my Lenovo, unplugged the installation USB and unplugged the USB enclosure, and switched on my Lenovo.

Grub booted fine to my internal Lenovo’s LEAP-15.6 . That thankfully is back to normal from what i can see.

My next “mission” now is to check out the SSD in the USB enclosure. ie shutdown and see if I can boot to that.

1 Like

@oldcpu well it should be capable of running Windows 11… You can see the version of the firmware? Version 1.38+ is best, for example;

tpm2_getcap properties-fixed | grep TPM2_PT_REVISION -A2

TPM2_PT_REVISION:
  raw: 0x9F
  value: 1.59
1 Like

I concede, the windoze on my Lenovo-X1 Carbon gen-9 laptop is only an old Windows-10. And that is also true for the windoze on my wife’s Lenovo X1 Carbon gen-4 laptop. I only keep windows as I have yet to find a GNU/Linux program as good as ‘Adobe’ for filling in my annual tax forms. And when it comes time to give away laptops to charity, if i still have MS-windows (and its recovery partitions) installed, it makes my life easier when cleaning up the laptop.

I will try and check out later this evening if I can still boot to the external SSD in the USB enclosure.

1 Like

I am making slow progress. My Lenovo X1 Carbon generation 9, whose GRUB I clobbered, now has the Grub2 boot repaired, as noted above.

SUCCESSFULLY BOOTED TO BACKUP LENOVO X1 CARBON Generation 4 (gen4)

I unplugged the external SSD enclosure (with the samsung SSD inside) and plugged it into my wife’s backup (which she now shares with me), the Lenovo X1 carbon gen 4 ( will refer to this as ‘gen4’ from here-on).

The openSUSE LEAP-15.6 on the external enclosure’s SSD booted gen4, albeit it had some inappropriate entries in the grub boot menu, which after booting I cleaned up with a grub command. I note the gen4 booted in UEFI mode. Its BIOS is set to allow BOTH Legacy MBR and UEFI GPT to boot.

I also ran some grub commands to try to ensure that not only grub2 was setup to use the /boot/efi , about also on the MBR. I have not tested that yet.

ORICO Encloser kept going to sleep

Then I tried to do a large update and with in 10 minutes or so, the SSD would not let me write to it

I speculated either the USB interface to the enclosure timed out, or the ORICO itself timed out. With the help of Google Gemini AI bot to give me the commands, using the vendor specifics, I setup this LEAP-15.6 install not to time out the USB associated with the ORICO enclosure. But as near as I can tell that did not work.

I must have had 5 or 6 black screens with no write possible within a period of one hour, forcing a reboot each time.

It appears that the ORICO enclosure’s firmware may have been putting the device to sleep - which may be specific to the realtek operating with this Samsung 990 EVO plus (and also an issue with the PRO version of this SSD). There may be a fix for that by realtek firmware (as this enclosure has a realtek chipset) but ORICO does not have a firmware update and I do not want to risk bricking the enclosure with a hacked realtek firmware update … I note gemini chat bot was giving me detailed instructions how to hack the firmware !!! but i was not tempted.

Instead, at my suggestion, with the chat bots help, I created a cron job that does a tiny write or read to the USB enclosure every 3 minutes. That seems to keep it alive and its been running now for a about an hour (while before every 10 minutes or less it would stop allowing read/writes).

I could not get zram to run but I think that because the failed install may have messed up the system a bit.

So I am now downloading a massive LEAP-15.6 update. After that is done I will call it a night and tomorrow focus on getting zram working (assuming the massive update doesn’t break the external SSD functionality).

1 Like

Let’s hope “heat” has been a consideration with the choice of the enclosure. nvme drives, although they don’t spin, can generate heat under stress.

There are no doubt enclosures that won’t dissipate the heat properly.
What happens? Could lead to throttling issues.

1 Like

Yes definitely ! Thermal heat could be an issue.

Even before purchasing this ORICO enclosure for the SSD, when comparing it to some significantly more expensive SSD enclosures, I noted that the more expensive SSD enclosures were purportedly designed more with cooling in mind. … I live in Thailand where its hot so I nominally pay attention to such.

However I also note this is for a backup, not for regular use. If my main laptop is ‘out of action’ this will only be intended for occasional urgent use, until I obtain a new laptop. Or, more likely, if I am updating the OS on my main laptop (with major re-partitioning, which i am actually thinking to do in Nov or Dec timeframe this year) then for the week or so when my main laptop is not ‘up to the operational state i like’ then I plan to use this enclosure/SSD as a backup.

Having typed that, I do believe the SSD enclosure was designed with thermal aspects in mind. I put an arrow on the image pointing to the thermal coductive silicon pad that comes with the enclosure:

and here is the page from the instructional manual:

I did thou made a mistake in putting the Samsung 990 EVO Plus SSD card into the ORICO enclosure. I forgot to ‘secure’ it with the provided ‘silicone stopper’. It seems pretty secure as is, but I assume those silicon stopper are provided for a reason, so sometime this week I should open up the ORICO enclosure, and try to insert the silicon stopper, hopefully without damaging the thermal conductive silicon pad.

1 Like

Trying to Keep My External SSD Awake (Part 1 of 2):

USB & GRUB Tweaks)

As noted, I had some hiccups with regular disconnections to my external Samsung 990 EVO Plus SSD, housed in an Orico M.2 M2PV-C3 USB 3.1 enclosure, on my openSUSE-15.6 Lenovo X1 Carbon Gen 4 laptop. The symptom would be a black screen where no access to the SSD was possible. I suspect the Realtek firmware on the enclosure might an old version with some quirks that are only fixed in newer versions, and this might cause it to go to sleep or lose connection unexpectedly.

Rejected Firmware Update: My research (using many commands to help me speculate as to the Realtek-9210 chipset firmware version on the Orico enclosure) suggested it has a very very very old Realtek firmware version. lsb -v suggested more precisely an RTL9210B-CG chip of version “bcdDevice 20.01” which I speculate likely corresponds to an early v1.20.xx series Realtek firmware. From what I read, the v.1.20.xxx series is very old, and I believe newer Realtek firmware versions have fixes for Samsung SSDs and also fixes for GNU/Linux use.

Ideally, I would go to the Orico website and download a firmware specific to the Orico M.2 M2PV-C3 USB 3.1 enclosure, but Orico do not provide firmware updates. Such is common, I believe, for very inexpensive enclosures such as this one.

I decided early on I was not going to attempt to install a more recent generic Realtek firmware as I do not have Orico’s configuration file that goes with the firmware and I could ‘brick’ this device by attempting a firmware upgrade without having such.

My Approach:

Instead of updating the firmware, to try and address this issue of ‘no-communications-with-enclosure-(after ~10 minutes of operation), with help from an AI bot, I’ve implemented a couple of changes related to USB power management and GRUB boot parameters.

I don’t know if this is the best approach, but I thought my approach may be of interest to share. Others quite possibly know of a better way, as saying I am new to this is likely an understatement.

Here’s what I’ve done so far, and the outputs from my system:

My System Setup for this:

  • OS: openSUSE-15.6
  • Kernel: uname -r output: 6.4.0-150600.23.53-default
  • Laptop: Lenovo X1 Carbon Generation 4 (my wife’s backup laptop that she is sharing w/me).
  • External SSD: Samsung 990 EVO Plus in an Orico M.2 M2PV-C3 USB 3.1 Enclosure

1. Trying to Prevent USB Autosuspend with a udev Rule

I speculated that Linux might try to put USB devices to sleep to save power, and this could be causing my issues. I created a udev rule to explicitly tell the system not to autosuspend my Orico enclosure.

Command to list udev rule files: I used this to confirm my rule file was there:

Bash

ls -l /etc/udev/rules.d/

Output:

total 328
-rw-r--r-- 1 root root 257841 Feb  2  2023 55-libsane.rules
-rw-r--r-- 1 root root  69323 Feb  2  2023 56-sane-backends-autoconfig.rules
-rw-r--r-- 1 root root    679 Jul 24 00:08 70-persistent-net.rules
-rw-r--r-- 1 root root    184 Jul 23 22:12 99-nvme-nosleep.rules

(My rule file is 99-nvme-nosleep.rules )

Command to view the content of my udev rule: This shows the specific rule I added:

Bash

cat /etc/udev/rules.d/99-nvme-nosleep.rules

Output:

ACTION=="add", SUBSYSTEM=="usb", ATTRS{idVendor}=="0bda", ATTRS{idProduct}=="9210", RUN+="/bin/sh -c 'echo -1 > /sys$DEVPATH/power/autosuspend && echo on > /sys$DEVPATH/power/control'"

Explanation (my understanding): This rule triggers when a USB device is added. It targets my Orico enclosure using its Vendor ID (0bda) and Product ID (9210). The RUN+ part then executes commands to set power/autosuspend to -1 (disabling autosuspend) and power/control to on (keeping it powered).

Commands to confirm the device ID and current power settings: I wanted to make sure the rule was targeting the right device and actually working.

Bash

lsusb | grep "0bda:9210"

Output:

Bus 002 Device 002: ID 0bda:9210 Realtek Semiconductor Corp. RTL9210 M.2 NVME Adapter

(This confirms 0bda:9210 is indeed my Orico enclosure)

Then I checked the runtime power settings for that specific USB device. Based on the Bus 002 Device 002 from lsusb and my ls /sys/bus/usb/devices/ output, I identified 2-1 as my enclosure.

Bash

ls /sys/bus/usb/devices/

Output:

1-0:1.0   1-2:1.12  1-3       1-7       1-7:1.1   1-8:1.0   1-9       2-0:1.0   2-1:1.0   usb2
1-2       1-2:1.13  1-3:1.0   1-7:1.0   1-8       1-8:1.1   1-9:1.0   2-1       usb1

(So 2-1 on Bus 2 seems to be it)

Bash

cat /sys/bus/usb/devices/2-1/idVendor
cat /sys/bus/usb/devices/2-1/idProduct
cat /sys/bus/usb/devices/2-1/power/autosuspend
cat /sys/bus/usb/devices/2-1/power/control

Outputs (in sequence) of those 4 cat commands:

Vendor:

0bda

Product

9210

Autosuspend:

-1

Power control:

on

I read that “ autosuspend: -1 and control: on “ means the rule seems to be working.

2. Adding a USB Quirk to GRUB

The AI bot I was using to help me, suggested I add a “quirk” to the kernel boot parameters via GRUB, which might help with specific USB device behaviors.

Command to check GRUB default parameters: This shows the line I modified in /etc/default/grub where i added " usbcore.quirks=0bda:9210:k ":

Bash

grep "GRUB_CMDLINE_LINUX_DEFAULT" /etc/default/grub

Output:

GRUB_CMDLINE_LINUX_DEFAULT="splash=silent resume=/dev/disk/by-uuid/1155d376-7a65-43b1-b2cc-b39966e95798 preempt=full mitigations=auto quiet security=apparmor usbcore.quirks=0bda:9210:k"

Command to confirm active kernel parameters: This shows what the currently running kernel actually received at boot:

Bash

cat /proc/cmdline

Output:

BOOT_IMAGE=/boot/vmlinuz-6.4.0-150600.23.53-default root=UUID=d092d224-6068-45e9-bf1d-6cb93366f23d splash=silent resume=/dev/disk/by-uuid/1155d376-7a65-43b1-b2cc-b39966e95798 preempt=full mitigations=auto quiet security=apparmor usbcore.quirks=0bda:9210:k

Explanation (my understanding): The usbcore.quirks=0bda:9210:k parameter is added. 0bda:9210 identifies my enclosure, and the :k flag is supposed to apply a specific workaround ( although I do not know if this was my issue – this is related to ensuring proper resume/reset behavior). The /proc/cmdline output confirmed it’s active.


In my next post I will note a cron job I put in place to also address the black screen and loss of communication with the SSD enclosure.


1 Like

Trying to Keep My External SSD Awake (Part 2 of 2): The Cron Job)

Following up from the above post about my Orico/Samsung external SSD disconnections, in addition to the udev rule and GRUB quirk, I also set up a cron job. This was actually my idea (not the AI bots), but when I suggested it to the AI bot, it noted this was a common approach and it then walked me through what I needed to do to set up the cron job.

My idea here is that even with the other power management settings, this enclosure might still decide to “sleep” if there’s no activity. So, I figured a periodic write operation might also keep it alive.

This was also done after the above rules and grub boot code change and the black screen issues (and no SSD access) were still occurring (which complicated my figuring out how to do this before the laptop became unusable), so I am not convinced the rules or the grub code change solved the no-communications issue (although possibly they helped).

Here are some details of my cron job setup. I think the last time I setup a cronjob was over 20 years ago, so I was very rusty and the AI bot had to walk me through this.

My System Setup (same as previous post):

  • OS: openSUSE-15.6
  • Kernel: 6.4.0-150600.23.53-default
  • Laptop: Lenovo X1 Carbon Generation 4 (my wife’s backup laptop that she is sharing w/me).
  • External SSD: Samsung 990 EVO Plus in an Orico M.2 M2PV-C3 USB 3.1 Enclosure

The Cron Job

I set up a user-specific cron job that runs a simple shell script every few minutes.

Command to list my user’s cron jobs:

Bash

crontab -l

Output:

*/3 * * * * /home/oldcpu/bin/keep_ssd_awake.sh > /dev/null 2>&1

Explanation (my understanding): This means the script /home/oldcpu/bin/keep_ssd_awake.sh is executed every 3 minutes (*/3 * * * *). The > /dev/null 2>&1 part just sends any output or errors from the script to nowhere, keeping things clean.

Command to show system-wide crontab (to confirm it’s not there):

Bash

sudo cat /etc/crontab

Output:

SHELL=/bin/sh
PATH=/usr/bin:/usr/sbin:/sbin:/bin:/usr/lib/news/bin
MAILTO=root
#
# check scripts in cron.hourly, cron.daily, cron.weekly, and cron.monthly
# Example of job definition:
# .---------------- minute (0 - 59)
# |  .------------- hour (0 - 23)
# |  |  .---------- day of month (1 - 31)
# |  |  |  .------- month (1 - 12) OR jan,feb,mar,apr ...
# |  |  |  |  .---- day of week (0 - 6) (Sunday=0 or 7) OR sun,mon,tue,wed,thu,fri,sat
# |  |  |  |  |
# * * * * * user-name command to be executed
-*/15 * * * * root  test -x /usr/lib/cron/run-crons && /usr/lib/cron/run-crons >/dev/null 2>&1

(Confirms my cron job is user-specific and not in the main system crontab.)

The keep_ssd_awake.sh Script

This is the script that the cron job runs. It performs the actual activity on the SSD.

Command to view the script content:

Bash

cat /home/oldcpu/bin/keep_ssd_awake.sh

Output:

Bash

#!/bin/bash
# --- Configuration ---
# Define the directory on the SSD where the temporary file will be created.
# This MUST be on your SSD (e.g., within your /home directory if /home is on the SSD).
TARGET_DIR="/home/oldcpu/.keep_alive_ssd"
# Define the name of the temporary file to be created/deleted.
TEMP_FILE="$TARGET_DIR/activity_marker.tmp"
# Define the log file for this script's activity.
# This should NOT be on the SSD you're trying to keep awake, so it logs even if the SSD sleeps.
LOG_FILE="/home/oldcpu/ssd_activity.log"
# --- Script Logic ---
# Set a robust PATH for cron execution, as cron has a minimal default PATH.
PATH=/usr/local/sbin:/usr/local/bin:/usr/sbin:/usr/bin:/sbin:/bin
# Ensure the target directory on the SSD exists.
# We use /bin/mkdir for absolute path reliability.
/bin/mkdir -p "$TARGET_DIR"
# Log that the script is starting an activity check.
# We use /bin/echo for absolute path reliability.
/bin/echo "$(date) - Running SSD activity check." >> "$LOG_FILE"
# Write a small amount of data to the temporary file on the SSD.
# This creates the file if it doesn't exist, or overwrites it.
/bin/echo "$(date) - Keeping SSD awake by touching: $TEMP_FILE" > "$TEMP_FILE"
# Crucially, ensure the written data is physically flushed to the disk.
# This tells the OS to commit the changes, ensuring the enclosure sees the activity.
/bin/sync
# Wait a very brief moment (1 second) before deleting. This ensures the activity registers.
/bin/sleep 1
# Delete the temporary file.
/bin/rm -f "$TEMP_FILE"
# Log that the script has completed the activity check.
/bin/echo "$(date) - SSD activity check completed." >> "$LOG_FILE"

Explanation (my understanding): This script creates a hidden directory (.keep_alive_ssd) on the SSD and then, every 3 minutes, writes the current date/time to a temporary file (activity_marker.tmp) within that directory. The sync command is vital here, as it forces the data to be written immediately to the physical disk, ensuring the enclosure registers the activity. It waits a second and then deletes the temporary file to keep the disk clean. There’s also some logging setup, which I’ve put in my home directory.

Command to show the SSD’s mount point (for context of TARGET_DIR ):

Bash

lsblk -f -o NAME,FSTYPE,SIZE,MOUNTPOINT,LABEL,UUID

Output (specific to my setup, others will obviously have a different system setup):

NAME        FSTYPE      SIZE MOUNTPOINT LABEL                UUID
nvme0n1                 931.5G
├─nvme0n1p1 vfat        512M /boot/efi  EFI                  ABCD-1234
└─nvme0n1p2 ext4        931G /          openSUSE_SSD_Root    d092d224-6068-45e9-bf1d-6cb93366f23d
sda                     465.8G
└─sda1      ext4        465.8G /mnt/data DataDrive            5678-ABCD

(My /home/oldcpu directory is located on the external SSD, so the TARGET_DIR for the script is indeed on the external drive.)


I’m hoping this combination of tweaks will help stabilize the connection.

So far, it has been working great ! None of the earlier black screen & no communications problems.

Has anyone used a similar approach, and/or has suggestions for a superior cron job/script (e.g., a more efficient way to trigger activity, or where the log file should ideally reside)?

Again – my preference would have been to update the Orico version of the Realtek firmware, but Orico do not provide firmware updates, and since I do not know the content of the configuration that Orico use when burning the Realtek firmware for this enclosure, I am not about to risk installing a generic Realtek firmware update for the Orico enclosure’s chipset.

1 Like

I have this external SSD (in the external ORICO enclosure) with LEAP-15.6 now setup such that it uses trim and also instead of a swap partition, it uses zram. I had to rely heavily on an AI bot to guide me through setting up zram. If there is a wizard available to do such automatically , I did not find it. The ai bot had me setup a configuration file to use zram, which was unexpected by me. Lots of choices but I mostly went with the AI bot’s recommendation (which is centered around the assumption that the PC in which this external SSD is running, has 16 GB of RAM).

1 Like

@oldcpu Progress :wink: I have a zram service already packaged up for openSUSE or are you using zswap?

zypper in systemd-zram-service
systemctl enable --now zramswap.service
1 Like

I have configured zram … i don’t know if that means i am using zswap.

I note an extract from ‘inxi -F’ : ’

Swap:
  ID-1: swap-1 type: zram size: 7.68 GiB used: 0 KiB (0.0%) dev: /dev/zram0

and this is the zram configuration file I created (with help from an AI bot):

[zram0]
zram-size = min(ram / 2, 8192)
compression-algorithm = zstd
fs-type = swap

I have it located here: /etc/systemd/zram-generator.conf

1 Like

I think a better answer from me is I am most likely using zram, not zswap. I’ve got it configured via systemd-zram-generator. The main configuration file I’m using is /etc/systemd/zram-generator.conf.

2 Likes

Had a play with the generator…

systemctl status systemd-zram-setup@zram0.service

● systemd-zram-setup@zram0.service - Create swap on /dev/zram0
     Loaded: loaded (/usr/lib/systemd/system/systemd-zram-setup@.service; static)
    Drop-In: /run/systemd/generator/systemd-zram-setup@zram0.service.d
             └─bindings.conf
     Active: active (exited) since Thu 2025-07-24 09:14:07 CDT; 8s ago
 Invocation: 6e7c84decbd749a4a0aba9b61a07c9db
       Docs: man:zram-generator(8)
             man:zram-generator.conf(5)
    Process: 5742 ExecStart=/usr/lib/systemd/system-generators/zram-generator --setup-device zram0 (code=exited, status=0/SUCCESS)
   Main PID: 5742 (code=exited, status=0/SUCCESS)
        CPU: 183ms

Jul 24 09:14:06 hostname systemd[1]: Starting Create swap on /dev/zram0...
Jul 24 09:14:07 hostname systemd-makefs[5743]: /dev/zram0 successfully formatted as swap (label "zram0", uuid 16a6104d-9e60-419a-9b2d-3f6f6bb37c0e)
Jul 24 09:14:07 hostname systemd[1]: Finished Create swap on /dev/zram0.

free -h

               total        used        free      shared  buff/cache   available
Mem:           125Gi       4.9Gi       119Gi        76Mi       2.4Gi       120Gi
Swap:          251Gi          0B       251Gi

swapon --show

NAME       TYPE        SIZE USED PRIO
/dev/zram0 partition 251.4G   0B  100

zramctl --output-all

NAME       DISKSIZE DATA COMPR ALGORITHM STREAMS ZERO-PAGES TOTAL MEM-LIMIT MEM-USED MIGRATED COMP-RATIO MOUNTPOINT
/dev/zram0   251.4G   4K   68B zstd                       0   20K        0B      20K       0B     0.2000 [SWAP]

cat /etc/systemd/zram-generator.conf 

[zram0]
zram-size = ram * 2
compression-algorithm = zstd
max-comp-streams = 12
swap-priority = 100
fs-type = swap
1 Like

Interesting. If I interpret this correctly, the AI bot provided zram-generator.conf I am using is more conservative, and good for weaker CPUs. It ‘caps out’ at 8GB even on systems with lots of RAM. It does thou still reduce writes to the SSD. It has less swap space than your zram-generator.conf.

In comparison the zram-generator.conf you use provides a huge virtual swap space that can be useful for Virtual Machines or large data sets. I guess is more optimized for speed with 12 compression streams where ‘highest priority’ ensures zram is used before any disk swap. And with double the RAM as swap, the system may never need disk swap. Downside may be that the need to compress/decompress with double the RAM size can put more of a load on the CPU.

How to compare in practice? Maybe the zram-generator.conf that an AI bot provided me, given I use it on laptops with ≤16GB RAM and normal workloads (web, office, light gaming) may be a good configuration. It is simple with lower CPU impact.

The zram-generator.conf of yours looks to be more aggressive, which I assume is very good for systems with large amounts of RAM and very powerful CPUs. ie large datasets or for virtual machines.

I suspect for my daily use there may not be much difference between the two.

I confess I have not tried to create an optimal zram-generator.conf for my main memory heavy applications (such as processing videos). Possibly using an AI bot there may be better configuration file 4k video processing.

All very interesting. Its definitely ‘over my head’ at this time.

1 Like

@oldcpu I still have a spare 24 cores available :wink:

The only reason to have swap around these days is for oom (which I’ve not had in way too long)… I usually just allocate 2GiB of swap, system never ever touches it so don’t worry too much.

Hibernation is a thing of the past, suspend to ram with the locked down kernel…

1 Like

Thinking some more, you might want to see what zswap offers if want to do caching…

Likewise tasks should be offloaded the the GPU encoders/decoders ;

journalctl -b | grep -E "guc|huc"

Jul 24 08:54:39 hostname kernel: i915 0000:04:00.0: [drm] GT0: GuC firmware i915/dg2_guc_70.bin version 70.45.2
Jul 24 08:54:39 hostname kernel: i915 0000:04:00.0: [drm] GT0: HuC firmware i915/dg2_huc_gsc.bin version 7.10.16

Also make sure your user is added to the Video and Render groups.

Reference groups:

oldcpu@orico-samsung:~> groups oldcpu
oldcpu : users render video

I note3 “dg2” in your guc/huc journalctl output. Does that not suggest your PC has an Intel Arc Graphics card (DG2 architecture)? I wonder if for newer Intel discrete graphics cards like Arc (DG2), GuC and HuC are often enabled by default or are so fundamental to the GPU’s operation that the driver handles their loading without requiring an explicit i915.enable_guc kernel parameter (such as “i915.enable_guc=2 kernel parameter,” ) and also I suspect you do not get the generating the “tainting kernel” messages that I see:

oldcpu@orico-samsung:~> sudo journalctl -b | grep -E "guc|huc"
[sudo] password for root: 
Jul 26 01:57:28 localhost kernel: Command line: BOOT_IMAGE=/boot/vmlinuz-6.4.0-150600.23.53-default root=UUID=d092d224-6068-45e9-bf1d-6cb93366f23d splash=silent resume=/dev/disk/by-uuid/1155d376-7a65-43b1-b2cc-b39966e95798 preempt=full mitigations=auto quiet security=apparmor usbcore.quirks=0bda:9210:k i915.enable_guc=2
Jul 26 01:57:28 localhost kernel: Kernel command line: BOOT_IMAGE=/boot/vmlinuz-6.4.0-150600.23.53-default root=UUID=d092d224-6068-45e9-bf1d-6cb93366f23d splash=silent resume=/dev/disk/by-uuid/1155d376-7a65-43b1-b2cc-b39966e95798 preempt=full mitigations=auto quiet security=apparmor usbcore.quirks=0bda:9210:k i915.enable_guc=2
Jul 26 01:57:28 localhost dracut-cmdline[223]: Using kernel command line parameters:  root=UUID=d092d224-6068-45e9-bf1d-6cb93366f23d rootfstype=ext4 rootflags=rw,relatime,stripe=4   BOOT_IMAGE=/boot/vmlinuz-6.4.0-150600.23.53-default root=UUID=d092d224-6068-45e9-bf1d-6cb93366f23d splash=silent resume=/dev/disk/by-uuid/1155d376-7a65-43b1-b2cc-b39966e95798 preempt=full mitigations=auto quiet security=apparmor usbcore.quirks=0bda:9210:k i915.enable_guc=2
Jul 26 01:57:29 localhost plymouthd[352]: 00:00:02.139 ply-utils.c:959:ply_get_kernel_command_line                   : Kernel command line is: 'BOOT_IMAGE=/boot/vmlinuz-6.4.0-150600.23.53-default root=UUID=d092d224-6068-45e9-bf1d-6cb93366f23d splash=silent resume=/dev/disk/by-uuid/1155d376-7a65-43b1-b2cc-b39966e95798 preempt=full mitigations=auto quiet security=apparmor usbcore.quirks=0bda:9210:k i915.enable_guc=2
Jul 26 01:57:29 localhost kernel: Setting dangerous option enable_guc - tainting kernel
Jul 26 01:57:30 localhost kernel: i915 0000:00:02.0: [drm] GT0: GuC firmware i915/skl_guc_70.1.1.bin version 70.1.1
Jul 26 01:57:30 localhost kernel: i915 0000:00:02.0: [drm] GT0: HuC firmware i915/skl_huc_2.0.0.bin version 2.0.0
Jul 25 18:57:34 orico-samsung plymouthd[779]: 00:00:07.746 ply-utils.c:959:ply_get_kernel_command_line                   : Kernel command line is: 'BOOT_IMAGE=/boot/vmlinuz-6.4.0-150600.23.53-default root=UUID=d092d224-6068-45e9-bf1d-6cb93366f23d splash=silent resume=/dev/disk/by-uuid/1155d376-7a65-43b1-b2cc-b39966e95798 preempt=full mitigations=auto quiet security=apparmor usbcore.quirks=0bda:9210:k i915.enable_guc=2
Jul 25 19:00:00 orico-samsung sudo[3060]:   oldcpu : TTY=pts/1 ; PWD=/home/oldcpu ; USER=root ; COMMAND=/usr/bin/cat /sys/kernel/debug/dri/0/gt0/uc/guc_info
Jul 25 19:00:55 orico-samsung sudo[3135]:   oldcpu : TTY=pts/1 ; PWD=/home/oldcpu ; USER=root ; COMMAND=/usr/bin/cat /sys/kernel/debug/dri/0/gt0/uc/huc_info
Jul 25 19:01:23 orico-samsung sudo[3141]:   oldcpu : TTY=pts/1 ; PWD=/home/oldcpu ; USER=root ; COMMAND=/usr/bin/cat /sys/module/i915/parameters/enable_guc
Jul 25 19:59:44 orico-samsung kernel: i915 0000:00:02.0: [drm] GT0: GuC firmware i915/skl_guc_70.1.1.bin version 70.1.1
Jul 25 19:59:44 orico-samsung kernel: i915 0000:00:02.0: [drm] GT0: HuC firmware i915/skl_huc_2.0.0.bin version 2.0.0
oldcpu@orico-samsung:~>

… still, that was most interesting. I have updated the configuration on this openSUSE-15.6 on the external 1TB SSD (in the SSD enclosure) and I plan now to check the openSUSE-15.6 on both my laptop and desktops.

1 Like